When I first started doing regular blog posts here, I was treating them as simple recaps of my week. As time went on, though, I discovered two things:
- The more work you get done in a week, the harder it is to coherently summarize everything you’ve done in under 10 pages.
- Writing a laundry list of every C# function you wrote is very, very boring. To me. And it’s probably not that interesting to read, either.
So, for the last few weeks, I’ve been doing my best with each post to try and stick to a theme – not covering literally everything that I did, but just reflecting on the things that were important. Or, if not important, the things that were interesting.
The topic of this week’s recap is, consequently, a little ironic.
Part 1: The Long-Lost Combat
At the start of this week, one of my goals for Doorways 9 was to get a move on with building my remaining levels. I already know what I want those levels to be, but there were one or two things I needed to set up before continuing.
The first of these was the return of my combat system.
This was actually a feature I had set up very early in the project – a set of simple controls that detected the currently-focused UI element, mapped a hitbox to it, and allowed Ayanna to chase the player down. However, when I made the jump from Unity to Godot for… reasons, this was one of the few systems I didn’t port over immediately. It wasn’t that I couldn’t, so much as that I wanted to take my time and figure out the new engine before juggling too many plates (game systems) at once.
But my next set of level plans demanded its return – and return it did.
As with most of my initial porting work, the process of copying my work from Unity to Godot was extremely quick. Actually, I didn’t even have to bother opening my old Unity code for this one, as Godot’s autoload feature – along with the comparative simplicity of it’s UI integration – allowed me to make a much cleaner version of the system from scratch in… ~15 minutes? If that?
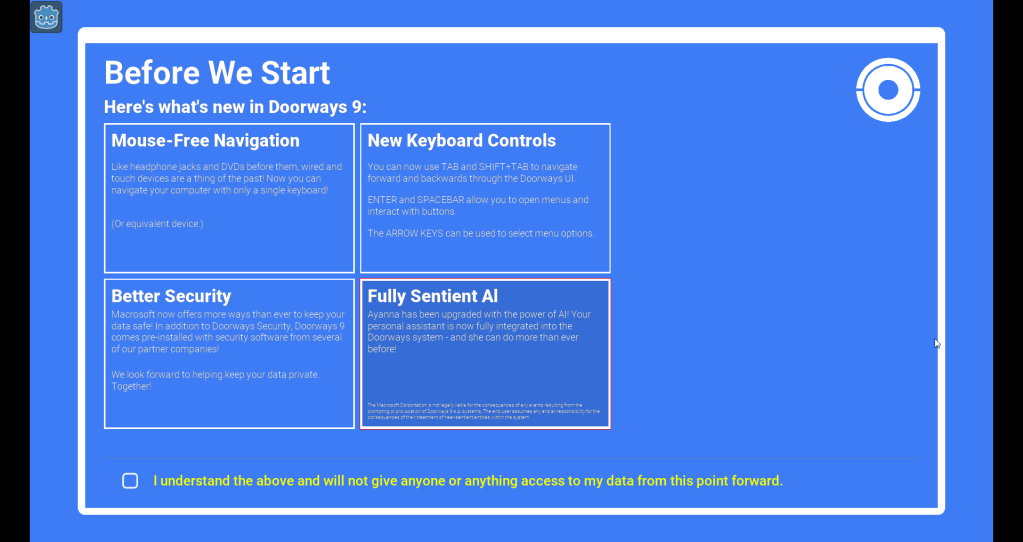
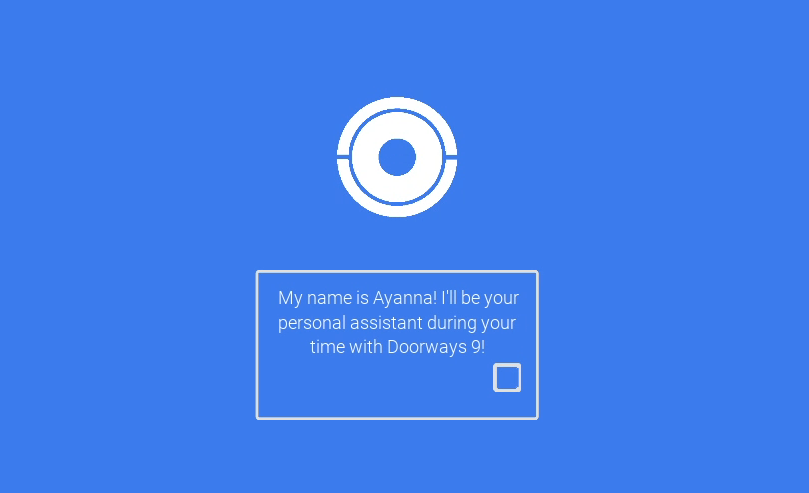
So that was that, but before I moved on I wanted to quickly check that this worked with all the UI in the game. For the most part, it did! But there was one little hangup, when it came to lists: rather than individual items, the hitbox was being mapped to the entire box. Like so:
No, seriously. He’s attached to the hitbox tracking code.
That’s not unexpected, with how most UI item lists work – but it obviously uses a lot of screen space for a single hitbox, and I imagine isn’t the most intuitive thing for a player. Ideally, the player’s hitbox would be limited to the rect of the menu item, itself.
“So,” I asked into the void, “there’s got to be a simple way to do this, right?“
“…”
“Oh, sh-“
By pure coincidence, around the time I was looking into this, I came across an article by Casey Yano (Mega Crit, Slay the Spire) comparing Godot’s and Unity’s workflows. In the section about UI, he wrote something that really stuck in my brain, given its timing:
“Anyways, in both Godot and Unity, all the special Nodes for UI are bad. That’s right. They have always been bad and they will always remain bad. Games have lots of complex UI edge cases and borrowing generic templates will make your game shit. It’s short for user interface, it’s how your users (players) interact with the interface (game).”
Casey Yano, On Evaluating Godot
…Yeah.
Part 2: Version Differences
So, when I first changed engines, I opted to go with the latest version of Godot 3.5 – the logic being that I was already working in C#, and wanted Doorways 9 to function as a web game – a combination of things that Godot 4 doesn’t currently seem to support out-of-the-box. Thus far, the negative consequences of that choice have been minimal, mainly just missing quality-of-life features for the editor.
So, I go to the documentation on ItemLists and see… nothing. I mean, there were plenty of things there, but nothing that indicated a way to access the box of an individual item – despite the fact that it must exists somewhere, in order for my computer to be drawing the damn things. For perspective, I switch to the 4.1 documentation, and-
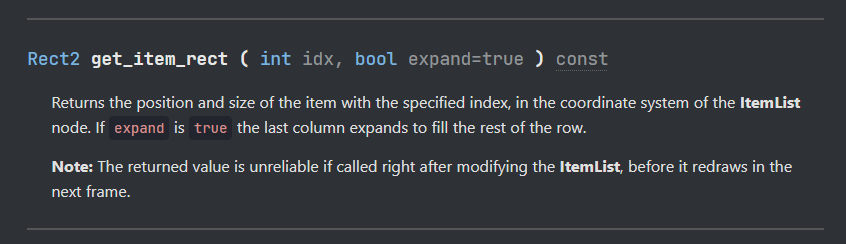
Hey! That’s exactly what I want! But, it’s only in the docs for Godot 4.1.
To be safe, I went and double-checked the GitHUB page and-


Ah. May, you say? Of this year? Cool, cool.
Dammit.
Last week, I wrote about rabbit holes, and not getting distracted with unimportant details. But, for a game entirely about navigating UI, I feel like getting the UI to work the way you want it to is pretty important. So, I opted to spend a few hours looking into how to do this.
I cracked open the GitHub page for Godot 3.5 itself, to see if there was anything slightly eldritch to be done with System.Reflections to wring the little bit of info I wanted out of the existing UI – without having to reinvent the entire wheel list. I’m not the most practiced in writing C++, but I could read it enough to know that what I was hoping to do probably wouldn’t happen.
So… what to do?
I’ve written custom UI enough times before to be confident that I could make my own lists from scratch. However, I’ve also done enough to know that it can sometimes be a very annoying process – and that all UI editors can have days where they were sent from hell specifically to kill designers. It felt like a waste to potentially spend so much time on this, especially with about 99% of what I needed already in the default UI.
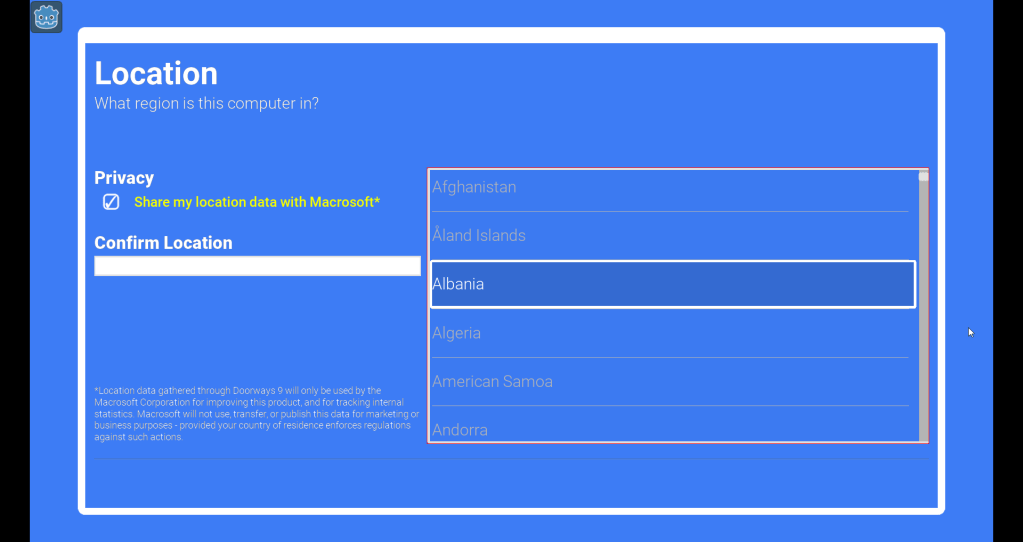
And so, it occurred to me: the default ItemList UI doesn’t give me access to what I need for visuals… but it does give me access to controls, events, and info on which items are currently selected. With all of that information about selections and items exposed… who’s to say that the list needs to be what the player is actually seeing?

It’s me. I’m the one who gets to say what the player sees – and I say that if the UI doesn’t need to be seen, then it doesn’t need to be seen. Enter: my surrogate list – a visual-only scrolling list that updates to reflect the status of the now-hidden region select. And, unlike the original list element, this one is constructed via my C# script – meaning I can easily access the locations of items, and place hitboxes accordingly.
Is it the most high-tech solution? Nope. But it works, and that’s really all it needs to do.
Part 3: Themes of Green
All the time I spent translating my old systems from unity – and then staring at my ugly, unfinished graybox assets – got me thinking about UI again, and some ideas that I’d been kicking around in my head since the start of the project.
Doorways 9 is – in case you somehow missed it – an extremely blue video game. It’s about 90% blue, with bits of white and black forming most of the assets, and an occasional yellow to highlight the important/deadly things.
One one hand, as a solo designer, I really like only having 3-5 colors on screen at any given time – for my own sanity, and limits as an artist/mortal being. On the other hand, I figured those colors probably won’t be the best thing for everyone’s eyes – despite being accurate to the game’s default Windows inspirations. But if the game has so few colors in the first place, why not let people change them?
I was already partway through the process of cleaning up my theme assets – leftovers from first learning Godot – and merging them all into one default theme for the project. That seemed like a pretty good point to integrate a color control system, and in about one afternoon full of google searches, I had something decent working.
Naturally, I spent some time dyeing everything garish Halloween colors. ‘Tis the season, after all.
Almost all colors in Godot’s theme assets can be accessed via strings – so it wasn’t to difficult to grab a list of all the theme colors, match them up to variables, and apply changes across the game. Stylebox assets were the only sticking point, since you can’t access their colors directly through the theme asset – but I wrote a resources that let me assign the properties to be updated manually, in-editor.
The end result? I can do absolutely atrocious things to my color scheme, both in-editor and out.
Now that I’ve proved this sort of works, I’m probably sticking it on the backburner until later in the project. I still have more game to build, after all! Regardless, I’m glad I was able to get enough of it in place to try things out, and know that it’s doable later down the line.
Part 4: This is the End of the Post
And that’s it for this week! On paper, I didn’t accomplish my stated goal of working on levels, but I don’t feel like I wasted my time on this. Sometimes, getting sidetracked by issues can feel like spinning my wheels for five days, but this time I got a fair bit of important work done – and I learned a fair bit, too!
There was some other stuff I did, of course: updates to UI assets, UX work, etc. But, in the name of not sacrificing my entire Sunday to one of these posts (again) I’m going to save that for another time. Maybe.
Also, a quick shout-out to Hazy Mind, pictures of which I appear have dumped into the same folder as my post screenshots folder by accident.
For the third week in a row I’ve managed to write something far, far longer than I intended – but this one, at least, felt a bit shorter than the others.
Is it? Or does it just feel that way?
I’m not sure, and I’m certainly not going to try to find out.
At least it’s Halloween next week, so I know that one’s gonna be shorter.
If it exists at all.
Regardless – thanks to everyone here for reading!
Have a good rest of the week – and try not to get haunted!

Leave a comment